Showing posts with label baking. Show all posts

Sunday, April 25, 2010

Blueberry Muffins


I've been searching for some new breakfast ideas.  In the past I've made some bagels, muffins, or the old stand by crustless quiche. Lately I've just been having some yogurt or eggs for breakfast. Usually my weekends are my baking time but not so much this weekend,  I had to work on Saturday and today was spent watching one of my best friends and her mom cross the line of the Big Sur Marathon, then off to hang out and relax with them for the day.  - Way to go Lisa and Lorraine.  But tonight when I got home I was determined to make some muffins before The Amazing race started.  I picked up a bag of frozen blueberries today and blueberry muffins would be made tonight!  I went to one of my favorite Gluten Free Cookbooks - The Allergy Free Cookbook by Alice Sherwood (if you haven't tried any recipes from this cookbook you really should).

Blueberry Muffins (page 63) - The Gluten Free Version

1/4 cup butter

2 cups GF all-purpose flour

1 tbsp baking powder

pinch of salt

1/4 cup superfine sugar plus extra for dusting (optional)

2/3 cup milk + 1/4 cup - per the gluten free version of this recipe (I use soy)

2 teaspoons lemon juice

1/2 teaspoon vanilla extract

1 egg, beaten

1 cup blueberries

1/4 cup chopped pecans*

ground cinnamon for dusting*

* I added the pecans and cinnamon (into the mix) which weren't called for in the recipe.  The cinnamon was just suggested for dusting.

Line 6 large or 10 small sections of a muffin pan with paper muffin cups or butter the pan well.  (I have cupcake tins so I needed all 12 of mine lined) Preheat oven to 400 degrees F

Melt the butter in saucepan.  Remove from the heat and let cool.

Sift the flour, baking powder and salt into a bowl.  Stir in the sugar and 1/4 teaspoon of cinnamon.

Make a well in the center, pour in the milk, lemon juice, vanilla extract and egg.  Fold the mixture quickly to combine, but don't worry if there are a few lumps.  Fold the blueberries and pecans carefully into the mixture.

Spoon (I use an ice cream scoop) the mixture into the prepared pan (they will be almost full).

If desired, sprinkle lightly with cinnamon and sugar.

Bake in the oven until risen, lighlty golden in color and the centers spring back when lightly pressed, about 25 minutes.

Transfer to wire rack, dusk with superfine sugar and let cool.

These muffins are so good!! Same great texture of a real muffin, awesome flavor and I think the addition of the cinnamon and pecans into the recipe was a good idea :)  Eventually I would like to get a muffin tin to make slightly larger ones but for now my cupcake tin works just fine. The great thing about this recipe is you could add pretty much any fruit you like to it...next time I think I'll add some cranberries, orange zest and a little bit of walnuts, hmmmm.

I love this cookbook and the recipes I have tried out of here.  This is also the cookbook that I get my bread recipe from.

Thursday, April 22, 2010

Cupcakes - what's not to love??


So last week I made two different brands of brownie mix and this week, you guessed it...cupcakes! Technically it's cake mix that I am comparing this week just made into cupcake form. In my mind cupcakes are way better than cake :) Little individual cups of yummy goodness.  Again, its Betty Crocker Chocolate Cake Mix compared to Arrowhead Mill's Vanilla Cake Mix. I've made the Betty Crocker ones before and loved them and I'll be making the Arrowhead Mill's ones for the first time.  The Arrowhead Mill's mix was in the batch of mixes one of my co-workers brought me a few weeks ago.

I love cupcakes, and I seek them out.  Over the Christmas I went to New Jersey, New York and Massachusetts to visit Bryan and our families.  On one of our little adventures to NYC we got the chance to go to BabyCakes!  Now those are some tasty cupcakes!! Wow.  I think I spent almost $40.00 on cupcakes, why?? Not because of the price (well sort of) but because I couldn't decide which ones to buy.  Sooo Bryan and I picked a few and got two of each so we could both try them, because I don't share cupcakes very well.  I think we ended up with the Vanilla, Chocolate and Brownie cupcakes.  All of which were AMAZING but I think the brownie ones were our favorite. - I can't wait to go back there again!

When Bryan came to visit me in February we took a weekend trip up to San Francisco.  We kept seeing this van that says "Kara's Cupcakes" on the side and I obviously kept trying to figure out where they were located.  On our last night there, we are heading to go pick up the car at our hotel and he saw there store and Bryan, being the amazing boyfriend that he is, went in just to see if they offered gluten free cupcakes.  To both of our surprise they did!  But, sadly they were sold out.  I was a little crushed until he told me that they had another store, and if I knew what flavor I wanted they would call over to see if they could hold two for us.  Thankfully the other store had some left, we got there right before they closed and the best part was, they were two blocks from out hotel! ha ha.  While at the store I started chatting with the girl behind the counter and to my surprise they started with Erin from BabyCakes NYC's recipe and adapted it to make it their own...no wonder why they were so good and we loved them so much. We were patient enough to not eat them until we got home (about 2.5 hours) before digging into our little gems.  Again, the cupcakes were AMAZING!!

This summer when I move I am hoping to try some cupcakes from Tu-Lu's Gluten Free Bakery (also in NYC).  If anyone has tried them, I would love to hear your thoughts :)

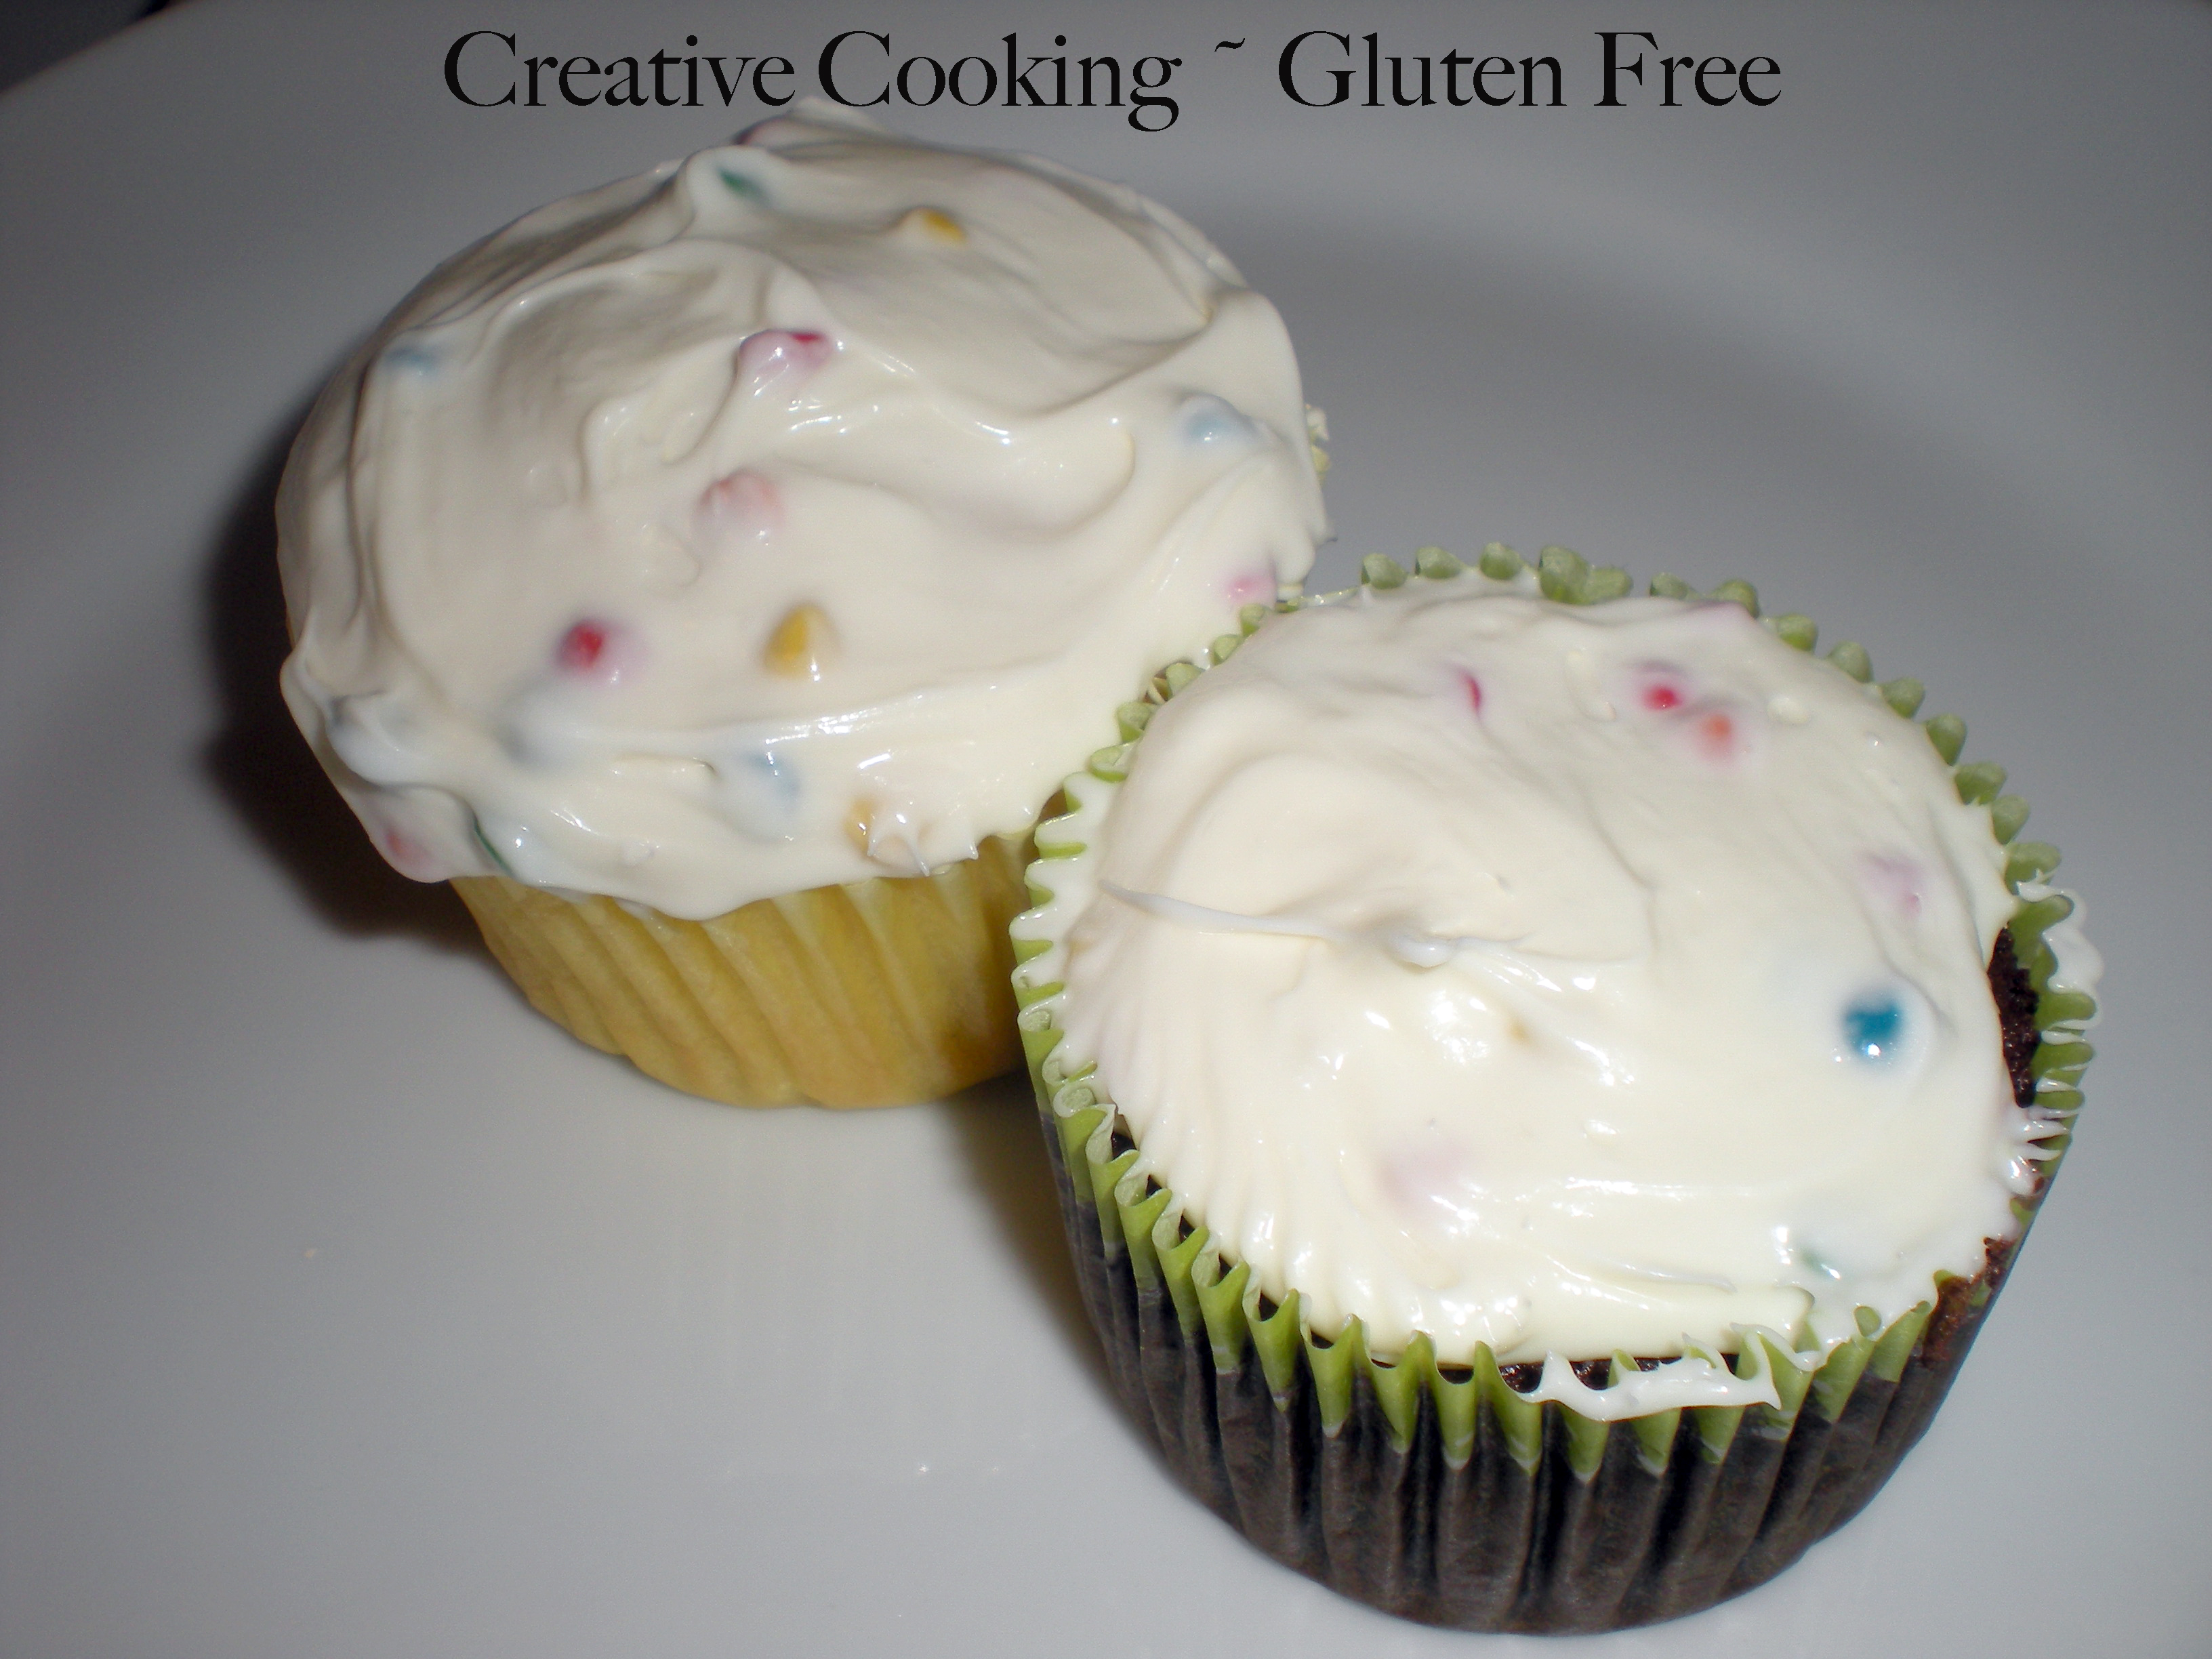
So here are the results of this weeks battle of the cupcakes (both sets of cupcakes will have the same frosting-yes its gluten free!!):

Betty Crocker Chocolate Cupcakes with Betty Crocker Rich and Creamy Rainbow Chip Frosting

vs


Arrowhead Mills Vanilla Cupcakes with Betty Crocker Rich and Creamy Rainbow Chip Frosting

Betty Crocker - I followed the directions on the back of the package and cooked it according to the time given.

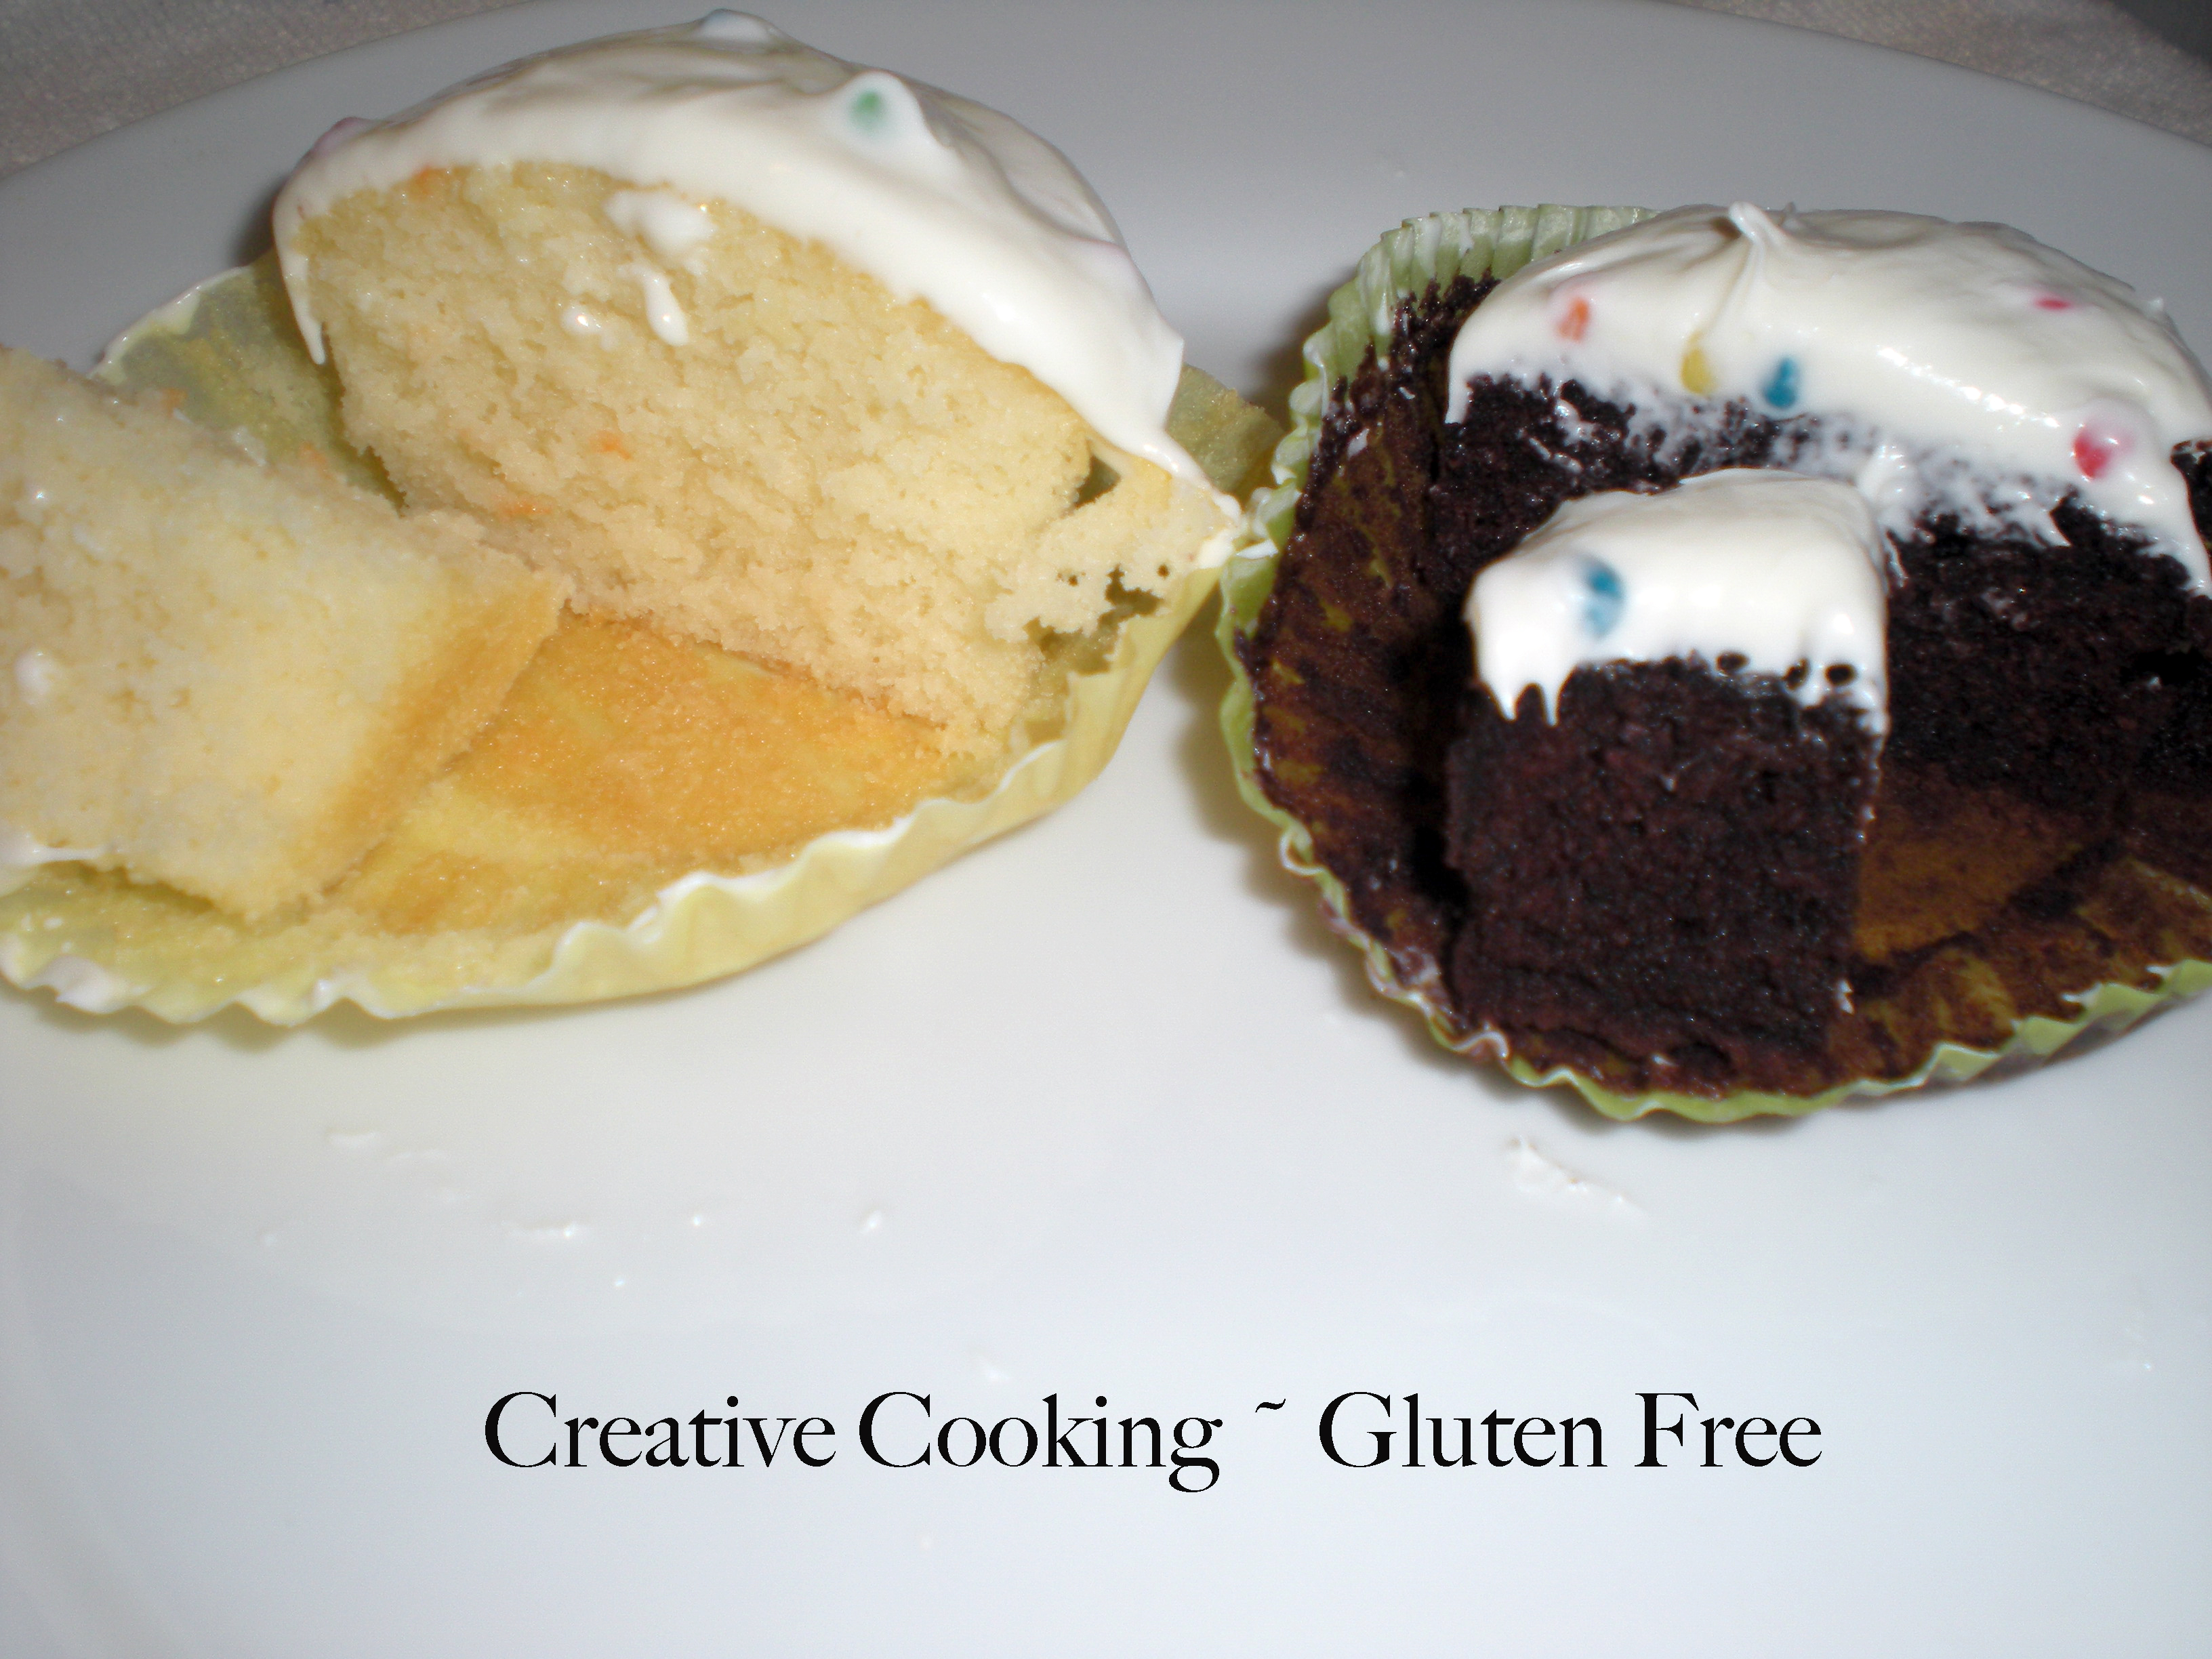
Moist, tasty, chocolaty.  Taste and texture of a "real" cupcake.  As with the brownie mix from Betty Crocker you can't tell the difference from the gluten containing cupcakes.

Arrowhead Mills - I followed the directions on the back of the package and cooked it according to the time given.

Moist, tasty vanillay.  The taste was pretty good, however the texture was a bit different.  They were a little grainy, almost like it has a little bit of a crunchy texture, more like cornmeal-ish texture to it.  Over all they were still very good, I really enjoyed them.

Now I have a little more than two dozen cupcakes and I am only one person so as with the majority of things I bake these will be coming to work with me tomorrow.  My co-workers have become my "test kitchen" over the past two years.

And the winner is....

I have to say that the winner of this one has got to be the Betty Crocker mix, but probably only because of the texture of the Arrowhead Mills.  You really can't tell that these and the frosting are gluten free.  Betty Crocker has done very well with these mixes, I am highly impressed.

Now to wash these down with a nice big glass of soy milk!!

Thursday, April 15, 2010

Brownie Battle


Last week a co worker of mine brought me a bunch of gluten free mixes to try.  They were from Arrowhead Mills (Brownies, Yellow Cake, Cupcakes and Chocolate Chip Cookies).  I made the brownies and they were pretty tasty.  I have a hard time just eating straight chocolate, I really like to have something with it such as nuts, peanut butter, coconut etc.  Yesterday I found some of the Betty Crocker mixes (which I haven't seen much of around me or they are either way to much money to buy and try). I made the Arrowhead Mills Brownie mix last week and the Betty Crocker Brownie mix today and here are my thoughts on them:

Arrowhead Mills

I followed the directions on the back of the package, and added about a 1/4 cup of creamy peanut butter and 1/4 cup chopped walnuts.  I baked them in a square pan and these turned out to be very cake like, very thick and chocolaty.  I think the peanut butter and nuts were a great addition to these!  I don't know if I would of been as much of a fan of them if they were just straight brownies.

Betty Crocker

Again, I followed the directions on the back of the package.  They also listed the baking times for different pan sizes, so this time I decided to bake them in an 11x7 pan.  The brownies were a lot thinner, which I enjoyed sooo much more.  I like the crunchy edges and these tasted just like the real ones.  Even though they came out a bit thin due to the pan size they were very moist. I couldn't tell the difference at all with these.  I will buy these again for sure.  My other favorite Betty Crocker GF mix is the chocolate cake - Love it!

I would have to say that the Betty Crocker ones are by far my favorite of these two mixes.  I just loved that they still truly tasted like the original Betty Crocker mix.

Here are the final product from the Betty Crocker Brownie mix:

Saturday, April 3, 2010

Coconut Macaroons by Elana's Pantry


I truly love the recipes on Elana's Pantry. They are tasty and easy to do. Today I made Elana's Pantry's Coconut Macaroons and they are awesome. The only alteration I made to the recipe was I topped it with some melted chocolate. I'll be honest, it's really hard not to eat these all tonight. I've had about three little ones already and could continue to eat them. You should all give these a try.
Gluten Free Coconut Macaroons
6 egg whites
¼ teaspoon celtic sea salt
½ cup agave nectar
1 tablespoon vanilla extract
3 cups shredded coconut

  1. In a mixing bowl whisk egg whites and salt until stiff

  2. Fold in agave, vanilla and coconut

  3. Drop batter onto a parchment lined baking sheet, one rounded tablespoonful at a time

  4. Pinch each macaroon at the top (like a kiss)

  5. Bake at 350° for 10-15 minutes, until lightly browned

  6. Serve


Monday, March 29, 2010

Bacon-Cheddar Scones


Oh yes you read the title correctly! People say bacon makes everything better and I would have to agree (well for the most part).  I try my hardest not to eat too much bacon, but I love it and its really hard to restrain myself when its around.   Being gluten free one of the hardest things for me is breakfast foods.  I can't eat first thing in the morning so I usually eat at my office.  Lately its been yogurt, but I was craving something else.  Eggs are good but I don't always want to make them before work and then put them in a container to heat up a little later on. I'm always on the hung for breakfast type recipes.  I need to build my recipe bank with more of these of recipes.

So I did some searching online for some gluten free recipes.  Even though its not gluten free I found a recipe online for these Bacon Cheddar Scones (check out this blog - Buns In My Oven for step by step photos and the non-gluten free version!!!) scones and tried to create them to the gluten free recipe that I had posted on here.  They just came out of the oven and they look, smell and taste fantastic!  You really have to try these!

Gluten Free Bacon-Cheddar Scones- (adapted from Bun in my oven's Bacon Cheddar Scones)


Ingredients:
3 C. gluten-free flour mix (see below)

3 tsp. baking powder

1/2 tsp. baking soda

1/2 teaspoon black pepper

3/4 tsp salt

8 slices of bacon (cooked and chopped or crumbled)

1 1/2 cups of shredded cheddar cheese

4 green onions, sliced thin

6 oz cold butter cut into small cubes

1 C. milk (or gluten-free soy milk) mixed with 4 T. vinegar–I used apple cider vinegar

1 large egg

2 tablespoons water

Jeanne’s Gluten-Free All-Purpose Flour Mix (mix together and store in fridge):
1 1/4 C. brown rice flour
1 1/4 C. white rice flour
1 C. tapioca flour
1 C. sweet rice flour (also known at Mochiko)
2 scant tsp. xanthan gum

Preheat oven to 425 degrees. Line baking sheet with a Silpat sheet. In a large bowl mix together the flour, baking powder, baking soda, salt and pepper.  Mix until blended well.  Add butter and keep mixing with your hands until it is crumbly and your butter is in small pea size pieces.  You can also use a pastry cutter or two knives. Add the cheese and mix until well blended.

Slowly pour in the milk mixture–do this carefully, because you might not need it all. I used about 7/8s of the milk. The dough should be just barely wet. Use your hands to carefully mix in the last bits of flour. The dough should be extremely light and fluffy. Handle carefully.

Turn out only a floured board.  I use tapioca flour to lightly flour a large cutting board and lightly press out the ball of dough until it is about 1/2 in thickness (you can also follow the original recipe and use a rolling pin and cut the scones according to Jeanne’s instructions).  Cut in half and depending on how many scones you want to make cut each half in third or quarters.  Place the scones on the baking sheet lined with the Silpat sheet.

In a small bowl beat egg and water together.  Lightly brush the tops of the scones and bake at 425 degrees for 20 minutes.  Cool on a rack and enjoy warm!

Sunday, March 14, 2010

Cranberry Oatmeal Cookies with Orange Glaze


I adapted the following Bob's Red Mill recipe - instead of raisins, I added some dried cranberries and topped them with an orange glaze.  This recipe was really quick and makes about four dozen cookies.

Gluten Free Oatmeal Cookies
Contributed by Bob's Red Mill Natural Foods


Ingredients

Directions
Preheat oven to 350°F. Beat butter and sugars together until smooth. Add vanilla and eggs; beat well. In a separate bowl, blend flour, cinnamon, baking soda, salt and Xanthan Gum. Stir flour blend into wet ingredients. Add oats and raisins and mix well. Drop rounded tablespoons of dough onto un-greased cookie sheet. Bake for 10 – 12 minutes, or until golden brown. Cool one minutes then transfer to wire rack. Makes about 4 dozen cookies.

*Eggless Option: Mix together 2 Tb. Flaxseed Meal with 6 Tb. of water and let sit for a minute. Add to recipe as you would the eggs.

Sunday, January 24, 2010

White Farmhouse Loaf


One of the best allergy/gluten free cookbooks that I have come across is called Allergy-Free Cookbook by Alice Sherwood.  This cookbook gives you recipes that can be made with out: dairy eggs, nut and gluten. Simply said, its amazing.  I love trying and re-creating these recipes.  I truly love her bread recipe - White Farmhouse Bread.  The quote on the page for the gluten free version is "Crustier, lighter and tastier than many store-bought equivalents" and hands down I agree.  Its nice and fluffy on the inside with a great crust.  I use this for sandwiches, toast or just spreading some yummy cheeses on it.  This would be great to make breadcrumbs too.

White Farmhouse Loaf - Gluten Free (also dairy and nut free)

1 3/4 cup gluten free all purpose flour (Plus extra for dusting) - I use Bob's Red Mill's all purpose flour

1tbsp xantham gum

1 1/4 tsp salt

1 1/4 tbsp raw sugar

1 tbsp instant yeast

4 tbsp flavorless nut-free vegetable oil, plus extra for the loaf pan

1 tsp lemon juice (I use fresh lemon juice)

1 egg, beaten

1 1/3 cups lukewarm water

- Sift the flour, xantham gum, salt and sugar into a bowl.  Add the yeast, oil, lemon juice and beaten egg.

- Add the water and mix to form a thick paste.  Beat well with an electric mixer for 2 minutes until smooth.

- Transfer the dough to an oiled 2lb loaf pan, dusted with a little gluten free flour.  Smooth the surface.  Cover loosely with oiled plastic wrap.  Leave in a warm place until the mixture reaches the top of the pan, about 30 minutes.  Dust with a little gluten free flour.

- Preheat oven to 400 degrees

- Bake in the oven until risen, richly golden in color and the base sounds hollow when turned out and tapped, about 1 hour and 30 minutes.

- Cool on a wired rack

-Don't be tempted to cut it before it cools because you'll spoil its lovely soft texture!

Saturday, January 16, 2010

Lemon Squares


Last weekend I went to a farm stand in Moss Landing and bought tons of awesome fruits and veggies. I also picked up some huge Meyer Lemons. I have been pretty much bed ridden this past week due to my back and was trying to think of a way to use these before they went bad. When life gives you lemons, make .... lemons squares!

Now, to find or create a gluten free lemon square recipe. Hmmmm. I did some searching online and couldn't find one I wanted to try. I looked at my flour supply and realized I'm a bit low on all that they are requiring anyway. Not a good start to my plan of making lemon squares.

I had a package of Bob's Red Mill - All Purpose Flour, and an old Betty Crocker Cookbook. I found a recipe for lemon squares and decided to just adapt that recipe with the flour I had on had. Nothing fancy or anything. I have to say they turned out pretty darn good!

Gluten Free Lemon Squares

1 cup of Bob's Red Mill - All Purpose Baking Flour

1/2 cup of butter, softened

1/4 cup powdered sugar

1/2 teaspoon Xantham gum

3 teaspoons of lemon zest

3 table spoons lemon juice

1/2 teaspoon baking powder

1/4 teaspoon salt

2 large eggs

Powdered Sugar

Heat oven to 350 degrees. Mix flour, butter, powdered sugar and 1 teaspoon of lemon zest. Press in un-greased square pan (I lined mine with parchment paper), 8x8x2. building up 1/2 inch on the sides.

Bake the crust for 20 minutes. While the crust is baking, mix the remaining ingredients in an electric stand mixer on high speed for three minutes until light and fluffy. Pour over the hot crust.

Bake an additional 30 minutes or until no indentation remains when touched lightly in the center. Cool completely in pan on wire rack. Dust with powdered sugar. Cut into 1 1/2 inch squares.

Wednesday, October 28, 2009

Pumpkin Seeds

gf2657

gf2650I've carved two of my three pumpkins for the season. When carving the second one I thought I should save the seeds and roast them...something I've never done before. I had no clue what I was doing but I guessed and they came out pretty darn good I must say. A tasty little snack!

Roasted Pumpkin Seeds

When cleaning out the pulp and seeds from your pumpkin before carving it separate the seeds from the pulp.  I think the best way to do this is to run them under cold water and discard the pulp.  On a baking sheet lined with parchment paper, lightly oil the seeds and sprinkle with kosher salt.  Roast in a pre-heated oven set at 350 degrees for 25-30 minutes.  About half way through mix the seeds around so they don't over cook on one side.  Cool and enjoy.  Store in an airtight container.

Below are some pictures of the pumpkins so far...only one more to carve and not sure what it will be just yet...

fp2632wm

jcp2642

fp2645

Saturday, October 10, 2009

Gluten Free Bagels

DSCN2408

Last year for my birthday my sister gave me a subscription to Living Without Magazine. They have some great recipes in there and lots of articles and resources. However the October/November issue this year had a recipe called "Gluten Free, Dairy Free, Best Bagels", of course I was dying to make these. I love Bagels, bread, pasta...carbs you name it, I love them!! And I kow they aren't really dairy free when you put cream cheese on top but I'm only Gluten Free so its ok ;) The Tofuti Cream "Cheese" is really good too for all of you how are Dairy Free!!

These came out great!! Oh man, its like a real bagel, not as fluffy but still amazing. I did some salt, garlic and then some plain ones. I thought I would mix it up a bit.

The whole process was really really easy, don't be intimidated by the ingredients especially in the flour mixture. Its well worth it! I will be making these again. The recipe says that you can freeze these, and I'm sure I'll be doing that and NOT eating all 8 bagels right now, even though they are that good.

Gluten Free, Dairy Free - Best Bagel

Makes 8
3 cups gluten-free Multi-Grain Flour Blend - See below
1 teaspoon salt
2 teaspoons flax meal
1½ teaspoons egg replacer
1 tablespoon xanthan gum
1 tablespoon yeast
2 tablespoons honey
2 tablespoons vegetable oil
1 teaspoon cider vinegar
1¼ cups warm water
1 teaspoon sugar
Brown rice flour, for rolling bagels
Cornmeal, for dusting pan


  1. Line a baking pan or cookie sheet with parchment paper and sprinkle it with cornmeal. Put some brown rice flour on a second baking pan or cookie sheet.

  2. Put Multi-Grain Flour Blend, salt, flax meal, egg replacer, xanthan gum and yeast into a mixing bowl and whisk together.

  3. In a separate bowl, whisk together honey, oil, cider vinegar, and 1  cup warm water.

  4. Using the paddle attachment of the mixer, slowly incorporate the liquid mixture into dry ingredients. Add more warm water, if necessary, to create a smooth consistency. Mixture should be quite thick. Beat on medium-high speed for 3 minutes.

  5. To shape the bagels, use a large spoon to scoop out the batter. Drop a spoonful on to the baking pan or cookie sheet sprinkled with the flour. Lightly roll dough in the flour to coat it and then shape into a ball. Flatten the ball slightly and using your index finger, create a hole in the center, large enough not to close during rising and baking. Repeat until all the dough is used.

  6. Place each bagel on the baking pan sprinkled with cornmeal. Lightly cover bagels with an oiled piece of plastic wrap and place pan in a warm place for bagels to rise, about 20 to 30 minutes.

  7. When bagels have risen, bring a skillet of water to boil. Add 1 teaspoon sugar to the water. (Sugar helps create a shiny crust.) Preheat oven to 375 degrees.

  8. Drop a few bagels into the boiling water. Simmer for 30 seconds, turn over and cook for another 30 seconds. Using a slotted spoon, remove bagels, drain away excess water and put bagels back on same baking pan. Once all bagels are boiled, bake them for 25 minutes in preheated oven. Cool on a rack


You’ll love the taste of these flavorful bagels. And they freeze well.

DSCN2389
DSCN2395 Toppings for Gluten-Free Bagels

Multi-Grain Flour Blend
MAKES 9 CUPS
1¼ cups garfava flour
1¾ cups super-fine brown rice flour
2 cups potato starch or arrowroot flour or chestnut flour
2 cups cornstarch or potato starch
1 cup tapioca starch/ flour
1 cup sorghum flour or amaranth flour

Mix all ingredients together. Store in a tightly covered container in the refrigerator until used.

Friday, October 9, 2009

Zucchini Bread

DSCN2367

DSCN2370

Last week there was a party at work and someone had made zucchini bread. It looked and smelled so good but sadly I couldn't taste it. I've been looking for fall recipes that include pumpkin, apples, breads, muffins, pies etc. I want warm, tasty comfort fall treats. I plan to make a pumpkin cheesecake soon, but I really wanted to make a bread or muffin this time to have an alternate thing to eat for breakfast.

So I did some searching online today for zucchini bread. I came across this recipe. I didn't follow it exactly (go figure!). Below is my adaptation

Gluten Free Zucchini Bread with walnuts


Moist Ingredients:
1 cup diced zucchini (washed but not peeled)
2 egg
1⁄2 cup canola oil
1 teaspoon gluten-free vanilla

Dry Ingredients:
1⁄2 cup white rice flour
1⁄2 cup sweet rice flour
1⁄4 cup corn starch
2 Tablespoons tapioca starch
1⁄2 teaspoon xanthan gum
1 cup sugar
3⁄4 teaspoon baking soda
1 teaspoon baking powder
1⁄2 teaspoon salt
1 teaspoon cinnamon
1/3 cup chopped walnuts*
Zest from one small lemon*

Glaze Ingredients:
1 Tablespoon powdered sugar
1⁄2 teaspoon lemon juice

Instructions

Combine moist ingredients and mix well. Set aside.

Combine the dry ingredients by mixing together well in a large bowl.

Add moist ingredient mix to dry ingredient mix. Stir until blended well. Grease a loaf pan and put mixture in pan. Bake 1 hour at 325 °. Check center for doneness with a toothpick. Remove from oven and let cool for a few minutes. Prepare glaze, which should be runny. Remove bread from pan and drizzle with glaze. Let cool.

*The original recipe says combine moist ingredients in a blender and mix until it resembles a milkshake. I don’t own a blender so I finely chopped the zucchini. The original recipe also did not call for any chopped nuts or lemon zest.


Saturday, September 19, 2009

Cranberry Nut Scones

Scones21

I adapted this recipe that I found on the Four Chickens Blog.  I had been searching for something to bake today and went back to her blog to see if I could find a recipe to use with her Gluten Free Flour Mix (see recipe below) and sure enough I found one.

I took her basic recipe and added a few things to it: some dried cranberries, chopped pecans and lemon zest.

Cranberry Nut Scones

ngredients:
3 C. gluten-free flour mix (see below)

1/3 C. sugar

3 tsp. baking powder

1/2 tsp. baking soda

3/4 tsp salt

1/2 C. copped pecans

The zest of two small lemons or one large lemon

1/4 C. (or 1/2 C.) dried cranberries

6 oz cold butter (or dairy-free butter substitute--I used Earth Balance)

1 C. milk (or gluten-free soy milk) mixed with 4 T. vinegar--I used apple cider vinegar

Jeanne's Gluten-Free All-Purpose Flour Mix (mix together and store in fridge):
1 1/4 C. brown rice flour
1 1/4 C. white rice flour
1 C. tapioca flour
1 C. sweet rice flour (also known at Mochiko)
2 scant tsp. xanthan gum

Preheat oven to 425 degrees. Line baking sheet with a Silpat sheet.

In a medium bowl, stir together flour, sugar, baking powder, baking soda, and salt.

Scones07

Add the cold butter pieces and using your fingers, (a pastry blender, or two knives), work the butter into the flour until the mixture resembles coarse corn meal. Don't worry about the larger nubs of butter--these add to the scones' flakiness.  Add in the cranberries, pecans and lemon zest.  Mix well.

Scones08

Slowly pour in the milk mixture--do this carefully, because you might not need it all. I used about 7/8s of the milk. The dough should be just barely wet. Use your hands to carefully mix in the last bits of flour. The dough should be extremely light and fluffy. Handle carefully.

Scones09

Turn out only a floured board.  I use tapioca flour to lightly flour a large cutting board and lightly press out the ball of dough until it is about 1/2 in thickness (you can also follow the original recipe and use a rolling pin and cut the scones according to Jeanne's instructions).  Cut in half and depending on how many scones you want to make cut each half in third or quarters.  Place the scones on the baking sheet lined with the Silpat sheet.  Lightly sprinkle each scone with sugar (if you have raw sugar use that, if not, regular white sugar will work just fine)

Scones11

Scones12

Scones14

Bake the scones for 17-20 minutes. They are done when they are lightly golden on the top. Cool briefly (or as long as you can stand it before devouring them).

Scones18

Thanks Jeanne for another awesome recipe!

Tuesday, July 7, 2009

Betty Crocker to the rescue...

GF_Home_Main2Oh happy day!  Hopefully they are actually in a wide variety of grocery stores this summer.  Check out Betty Crocker's website.   Here is a link to some gluten free recipes on their site.

Tuesday, March 17, 2009

Happy Birthday Rob

gf16451

Seeing as Rob's birthday is March 15th we decided that green frosting would go better with St. Patric's day better than hot pink (plus I couldn't find pink food coloring anywhere!)

Rob...I hope you had a great birthday and you enjoyed your cake! And to everyone else...Happy St. Paddy's Day!

Monday, March 9, 2009

Chocolate Cupcakes with Cinnamon-Vanilla Frosting

gf1636

The cupcake recipe is from Bob's Red Mill.  I was on the hunt for a new cupcake recipe and didn't find too much right away.   I went on Bob's Red Mill site and looked to see if he had any and found this chocolate cake recipe instead.  I figured why not just make cupcakes out of this cake recipe.

Chocolate Cupcakes with Cinnamon-Vanilla Frosting

1-1/2 cup Gluten Free All Purpose Baking Flour
1 cup Brown Sugar
1/2 cup Cocoa powder, unsweetened
1 tsp. Baking Soda
1 tsp. Xanthan Gum
3/4 tsp. Salt
1/2 cup Milk (cow, soy or rice)
1/3 cup Butter, Margarine or Shortening
1 large Egg
1 tsp. Vanilla
3/4 cup warm brewed Coffee


Preheat oven to 350degrees. Line a cupcake pan with paper lingers. Set aside. Place all ingredients, except coffee, in large bowl and blend with electric mixer. Add coffee and mix until thoroughly blended. Pour into prepared cupcake pan and bake for 20 minutes minutes or until toothpick inserted in center of cake comes out clean. Serves 16.

Cinnamon-Vanilla Cream Cheese Frosting

4oz butter softened


4oz cream cheese softened

2 cups powder sugar divided

1 teaspoon ground cinnamon

1 teaspoon vanilla extract

~In large bowl beat the butter and cream cheese with electric mixer
~Switch the mixer to low speed and add the powder sugar one cup at a time ~Mix until smooth and creamy, add cinnamon
~Beat in the vanilla extract

(I really do heart cupcakes!)

Monday, January 19, 2009

Steamed Fish Packets with Stuffed Tomatoes

gf1452

Steamed Fish Packet (with spinach, swiss chard and lemon)


1/2 pound fresh spinach, rinsed well

1/2 pound fresh swiss chard, rinsed well and chopped (removing stems)

three cloves of garlic sliced

four fillets of white fish (stripped bass) about six to eight ounces each

one lemon sliced into 1/4 inch pieces

4 pieces of Aluminum Foil

two tablespoons of butter divided

~ Start by melting one table spoon of butter and two cloves of garlic in a large skillet. Add spinach and swiss chard in batches. Once it has wilted enough add more until all spinach and swiss chard fits in the pan. Squeeze some fresh lemon juice, season with salt and pepper.

~ Lay out the four sheets of Aluminum Foil. Cut the remaining one table spoon of butter into four pieces, place a piece on each sheet of foil. Place 1/4 off the spinach and swiss chard on each of the sheets. Top with a piece of fish, add pieces of sliced garlic and a lemon slice. Season with salt and pepper.

~Wrap each up each piece of foil and place on a rimmed baking sheet. Bake at 400 degrees for 15-20 minutes depending on the thickness of the fish.

Baked Stuffed Tomatoes

(adapted from Martha Stewart's Every Day Food issue #3, page 101)


4 plum tomatoes cut in half lengthwise (slice off a small sliver from the skin side so they halves lay flat in the baking dish, discard the seeds)

1/2 cup cooked qunioa

1/4 cup crumbled feta cheese

1/2 teaspoon dried oregano (thyme, marjoram etc.)

1 tablespoon olive oil

season with salt and pepper

~Stuff each tomato with the mixture and place in a baking dish

~Bake until tomatoes are soft and topping is crisp and browned, about 15-20 minutes.

Wednesday, October 8, 2008

Apple Crisp


I LOVE the Fall and everything about it: The Weather. The colors of leaves. The smell in the air. Sweaters. Hot apple cider. Hearing the leaves crunch under my feet as I walk. Apple picking. Pumpkins. Soup and lots of it. Most of all is Apple Crisp! I can't live with out that come this time of year. With that said, I was on the hunt for some gluten free oats. I kept hearing that Bob's Red Mill carried them, but they are on hold right now. So I was even more determined to create a new apple crisp recipe with out oats and here it is:

Apple Crisp

7-8 Medium/Large Apples (Macs or any baking apples...I used pippins)

Flour Mixture:
1 Cup Almond Flour
1/2 Cup Brown Sugar
1/4 Cup White Sugar
1 Teaspoon Cinnamon
1 Teaspoon Nutmeg
1/2 Cup Slivered Almonds
1 Stick of melted butter

(I double the above flour mixture so I can have a layer in the middle of the apples...see below)

~Butter the bottom of a 9x9 baking dish
~Mix together the dry ingredients
~Mix in butter (stir until well combined)
~Peel and slice/cube apples, squeeze a little bit of lemon juice over the apples to keep from turning brown
~Pour half of the apples on the bottom of the buttered baking dish.
~Spread half of the flour mixture over the apples.
~Pour the remaining apples over the flour mixture.
~Spread the remaining flour mixture evenly over the apples.
~Bake at 350 for 35 minutes.
~Turn the heat to 375 and bake for an additional 5-10 minutes or until it starts to bubble.
~Serve with vanilla ice cream and enjoy!

Monday, September 1, 2008

I Heart Cupcakes!


Today I thought I would attempt to create a recipe and bake cupcakes. Boy was I wrong! I created a recipe and tried it, only for it to be thrown in the trash in the middle of baking. You know when you make cupcakes from a box (Or even from scratch)the batter is all nice and runny? Not this one, it was like dough. This was my first attempt at using coconut flour, which I thought could just be replaced on a 1:1 ration, but after todays experiment I think I need to do more research. The dough smelt good anyway but no luck with turning this disaster into wonderful little cupcakes.

I went online and did a search for cupcake recipes that are made with coconut flour, which I didn't find many at all. I found one on Elana's Pantry so I thought I would give it a try. They turned out great. Sadly I can't take any credit for these cupcakes. I can take credit for the frosting though. The recipe is as follows and please visit her website for more awesome recipes:

Gluten Free Vanilla Cupcakes
with Cream Cheese Frosting

1/2 cup coconut flour (sifted)
1/2 teaspoon salt
1/4 teaspoon baking soda
6 eggs
1/2 cup grapeseed oil
1/2 cup agave nectar
1 tablespoon vanilla extract

~In a medium bowl combine flour, salt and baking soda
~In another bowl beat together eggs, grapeseed oil, agave nectar and vanilla
~Mix wet ingredients in to the dry ingredients with an electric mixer until smooth
~Pour batter in to 12 prepared muffin tins (either well oiled or with cupcake tins)
~Bake at 350 for 20 minutes
~Cool completely
~Top with Cream Cheese Frosting (see recipe below)

Cream Cheese Frosting

4oz butter softened
4oz cream cheese softened
2 cups powder sugar divided
1 teaspoon vanilla extract

~In large bowl beat the butter and cream cheese with electric mixer
~Switch the mixer to low speed and add the powder sugar one cup at a time until smooth and creamy
~Beat in the vanilla extract

Enjoy!

(Please visit Elana's Pantry for more recipes and ideas on Gluten Free Cooking/Baking and Living)

Tuesday, August 26, 2008

BREAD


I don't have any of my own pictures to post yet but this weekend I made my first loaf of gluten free bread. And the best part...its not as bad as it sounds, actually its really tasty.

I bought a bag of bread mix from Bob's Red Mill and thought I would give it a try and I'm happy I did. I just ordered some of their other products and can't wait to give them a try!

Tuesday, July 8, 2008

Quinoa Muffins


Quinoa Muffins
(Makes 12 Muffins)

1 cup quinoa rinsed
¼ cup vegetable oil, such as safflower, plus more for pan
1 ½ cups all-purpose gluten free flour (spooned and leveled), plus more for the pan
½ cup almond flour
¾ teaspoon of xanthan gum
¾ cup packed dark-brown sugar
1 ½ teaspoons baking powder
1 teaspoon salt
½ crasins
½ chopped nuts
¾ cup whole milk (I use soy milk)
1 large egg
1 teaspoon pure vanilla extract

~ Preheat oven to 350°
~ In medium saucepan, bring quinoa and 1 cup water to boil. Reduce to a simmer, cover and cook until water has been absorbed and quinoa is tender, 11 to 10 minutes.
~ Meanwhile, brush a standard 12-cup muffin pan with oil; dust with flour, tapping out excess.
~In a medium bowl, whisk together flours, sugar, baking powder, xanthan gum, salt, crasins, nuts and 2 cups cooked quinoa (reserve any leftover quinoa for another use)
~In a small bowl, whisk together oil, milk, egg and vanilla. Add milk mixture to flour mixture and stir just until combined; divide batter amount prepared muffin cups.
~Bake until a toothpick inserted in center of a muffin comes out clean, 25-30 minutes.
~Cool muffins in pan, 5 minutes; transfer to a wire rack to cool completely.
~Store in an airtight container up to 5 days


Adapted from Martha Stewart: Everyday Food Jan/Feb 2008 pg. 142